Living long-term in an RV through winter is a different problem than parking a rig for storage. A storage rig gets drained, blown out, and forgotten. A long-term rig needs to keep functioning every day, in temperatures the manufacturer never designed for.
This is a practical guide for residents who plan to spend the winter on a long-term site, written from the patterns we see at the residents who get through January without water-line issues, and the ones who don't.
The five systems that fail first
Every winter horror story in an RV park traces back to one of five systems:
- Water lines, exposed PEX between the spigot and the underbelly, or in the underbelly itself.
- Holding tanks, black or grey water freezing solid at the drain valve.
- Propane regulators, frost-flashing in cold-and-wet conditions.
- Slide-out seals, ice formation tearing the seal on retraction.
- Roof and seam moisture, condensation freezing inside the walls.
If you address all five before the first hard freeze, the winter is a non-event. If you address them in January, you're already in repair mode.
Skirting: the single biggest move
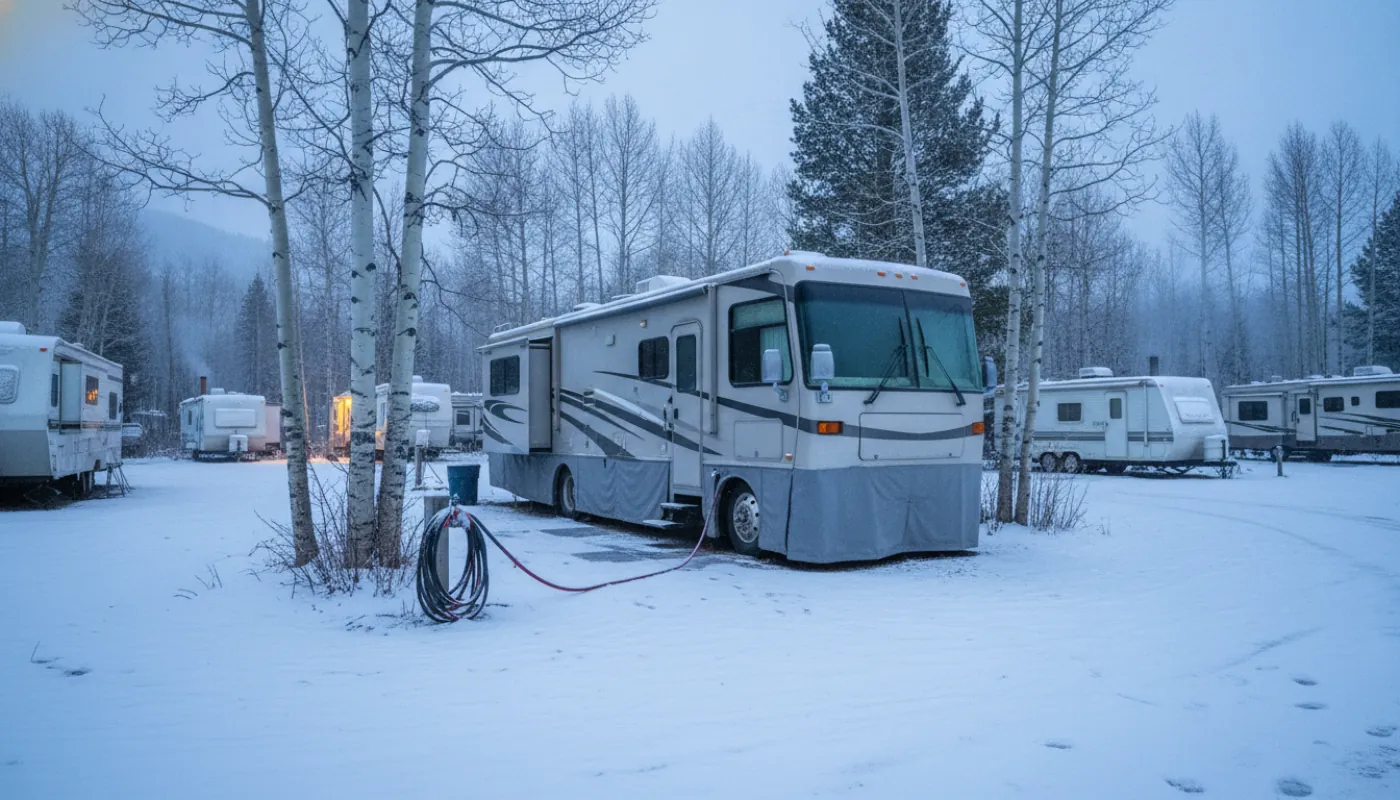
A skirted rig stays meaningfully warmer than an unskirted rig, and dramatically reduces water-line and tank freeze risk. Skirting:
- Stops wind from accelerating heat loss from the underbelly.
- Traps the residual warmth from your heated underbelly tanks.
- Creates a pocket where a small electric heater can keep the underbelly at 40 °F with minimal cost.
Three skirting options, from cheapest to best:
- Hay bales / foam board against the trailer skirts. Works in a pinch but ugly and not all parks allow it.
- Manufactured skirting kits: inflatable AirSkirts tubes, snap-on EZ Snap vinyl panels, or custom vinyl from a local fabricator. Roughly $1,000–3,000 depending on type and rig size. Best ROI for any rig planning multiple winters.
- Wood-framed permanent skirting. Common in long-term parks where rigs don't move; $2,000–6,000 depending on rig.
Whatever you choose, leave at least one access panel for under-rig service. You will need it.
Water-line management
Two strategies, depending on your park's setup:
Strategy A: Heated hose + insulated supply line (most parks)
- Use an actual heated drinking-water hose (Camco, Pirit, Valterra). Wrap the connection points at both ends with foam pipe insulation and self-regulating heat tape. Run the heat tape straight along the pipe (never spiraled or overlapping itself, which is what started older heat-tape fires), unless the product explicitly permits it.
- Above ~25 °F, the heated hose alone is fine.
- Below 20 °F, add the foam wrap and heat tape on the spigot side. The spigot itself is the most common freeze point, not the hose.
- Drip a faucet at night if a multi-day deep cold is forecast. The cost in water is trivial; the cost of a frozen split is not.
Strategy B: Fill-and-disconnect (extreme cold)
- Fill the freshwater tank at the warmest hour of the day.
- Disconnect the city water inlet.
- Run on the pump and freshwater tank for the cold stretch.
- The freshwater tank is in the heated underbelly; it doesn't freeze.
Strategy B is required below ~10 °F regardless of how well your hose is heated. Plan for 3–5 days of freshwater per fill.
Holding tanks: keep them moving
The two failure modes:
- Black tank freezes solid at the dump valve. You can't open the valve to drain.
- Grey tank freezes in the line between the trailer and the sewer connection.
Prevention:
- Keep the dump valves closed between dumps. A tank with liquid in it freezes slower than a tank that's empty and damp.
- Add a small amount of non-toxic RV antifreeze to grey and black tanks when nights drop below 15 °F. Half a gallon is plenty. Use only the pink propylene-glycol antifreeze made for RV potable systems: never automotive antifreeze, which is ethylene-glycol-based, toxic, and hard on tank seals.
- Insulate the sewer hose with a foam sleeve when connected, and pitch it downhill aggressively so nothing pools.
- Dump on a warm afternoon, not at 8 AM when it's coldest.
If your dump valve does freeze, do not use a torch. Heat the valve area with a hair dryer or a heat gun on low. Patience beats damaged plastic.
Propane in cold weather
Propane vaporizes more slowly the colder it gets. Two consequences:
- High-demand appliances starve. Furnace + water heater + stove together can outrun a single 30-lb tank below 0 °F.
- Regulators frost over. Especially the two-stage regulators common on park trailers.
Mitigation:
- Use two tanks on an auto-switchover regulator, never one.
- For long stays in deep cold, upgrade to larger tanks, a 100-lb stationary tank if your park allows it, or a regular fill schedule from a local propane company.
- Wrap the regulator in an insulated cover (sold for $15–30).
- Run the furnace, not just space heaters. The furnace pulls warm air through the underbelly ducts, that's the warmth keeping your tanks unfrozen. Skipping the furnace to save propane is the most common cause of frozen tanks in winter.
A working carbon monoxide detector is mandatory any winter you're running the furnace or a propane space heater. Both are combustion appliances, and a sealed, skirted rig with the windows closed is exactly the condition that lets CO build to dangerous levels. Test the detector before the first cold night, replace it if it's older than its rated life (most are 5–7 years), never run an open-flame or catalytic heater while you sleep, and crack a vent whenever a catalytic heater is on.
Slide-outs
Most slide-out failures in winter come from running the slide in or out with frozen seals. The seals tear, the rollers bind, and a $4,000 repair is in your future.
Rules:
- Don't operate the slide below 20 °F unless you absolutely have to.
- Treat the seals with a silicone slide-seal lubricant in late fall.
- Brush snow and ice off the slide topper before retracting.
- If the slide is in for the season, leave it in until spring, minimizing operation cycles.
Condensation and moisture
Long-term winter living produces a lot of indoor moisture: showering, cooking, breathing. With windows closed and the furnace running, that moisture has nowhere to go but into your walls.
The fixes are mundane and effective:
- Run a small dehumidifier in the living area. Empty it daily.
- Crack a roof vent and a window during showers and cooking, the small heat loss is worth it.
- Wipe condensation off windows in the morning before it can soak the trim.
- Vent the bathroom every shower. Always.
Mold inside an RV wall is a teardown-grade problem. Don't ignore the moisture.
Site-level habits
A few habits the long-term winter residents we know swear by:
- Walk the rig every morning. Look at hose connections, the sewer hose, the propane regulator. 60 seconds of inspection catches 90% of problems before they're problems.
- Keep a 5-gallon jug of fresh water inside as backup. When your city water goes down for any reason, you'll be glad it's there.
- Maintain a second power source. A small inverter generator that can run the furnace and one space heater is a winter-storm lifesaver if park power fails.
- Know your park's after-hours number. Some parks staff overnight in winter; some don't. Know which yours is.
The post-winter checklist
When the cold breaks in spring:
- Pull the skirting and inspect the underbelly for moisture, mouse intrusion, and chewed wiring.
- Pressure-test the water system before you trust it again.
- Re-treat the slide seals.
- Inspect roof seams, winter UV and freeze-thaw cycles are hard on caulk.
Winter is hard on a rig. But residents who handle these systems intentionally come out of the cold with a rig that lasts.
If you live long-term at an RV park and want to swap winterizing tips with neighbors, find services, or coordinate work parties, find your park on RV Park Hubs, the resident-tier modules are built for exactly the long-term community use case.